Search for answers or browse our knowledge base.
Using Email Encryption Features
DTS SecureMail Email Encryption allows you to securely send patient medical data such as x-ray images or other chart information via email and meet HIPAA requirements for patient privacy and other regulatory compliance requirements. Using email encryption is easy. Refer to the following guide to learn more:
Sending an encrypted email message
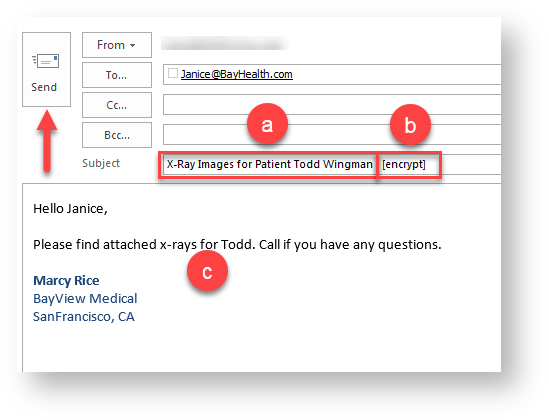
- Compose Message: Compose your message using the following steps:
- Enter Email Subject: Enter an appropriate subject into your email message.
- Insert Encrypt Tag: with cursor still on the subject line of your email, press “Alt” + “E” on your keyboard to insert [encrypt] tag.
- Enter Note: Enter a note to the recipient of your message.
- Send Message: Click “Send” to send message to recipient.

If secure replies from recipient are desired in addition to secure sending, press “Alt” + “P” on your keyboard to insert [encrypt-portal] tag INSTEAD of [encrypt] tag as shown above. Doing so will force message delivery to encryption portal where recipients can reply to messages securely. In both cases, you will receive a receipt when your message is delivered.
Receiving an encrypted email message
Unless [encrypt-portal] tag is used as described above, messages sent encrypted are delivered directly to recipient whenever end-to-end TLS encryption can be established. In this case, recipients will not receive a portal invitation as described below but will receive the message directly in their inbox with the following footer at the end of the message:

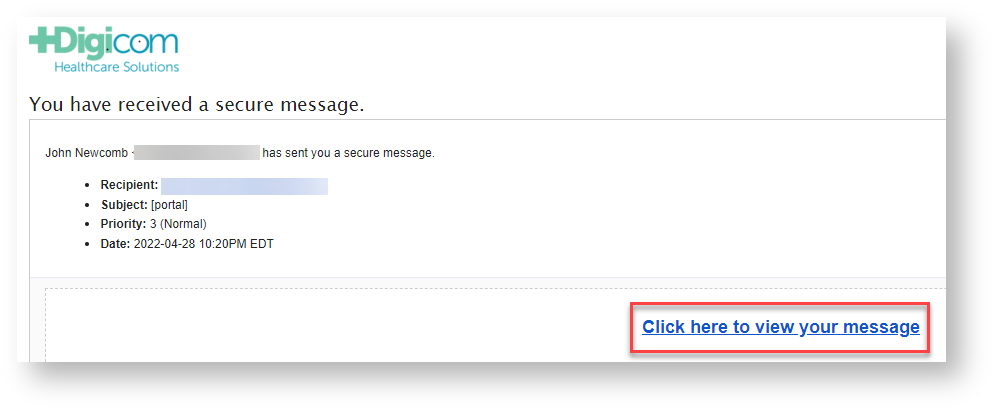
- Recipient Receives Message: Message recipient receives an email message indicating they have an encrypted message from you (your name or office name will be shown) waiting to be read. They will then click the email link to browse to the DTS Email Encryption Portal.

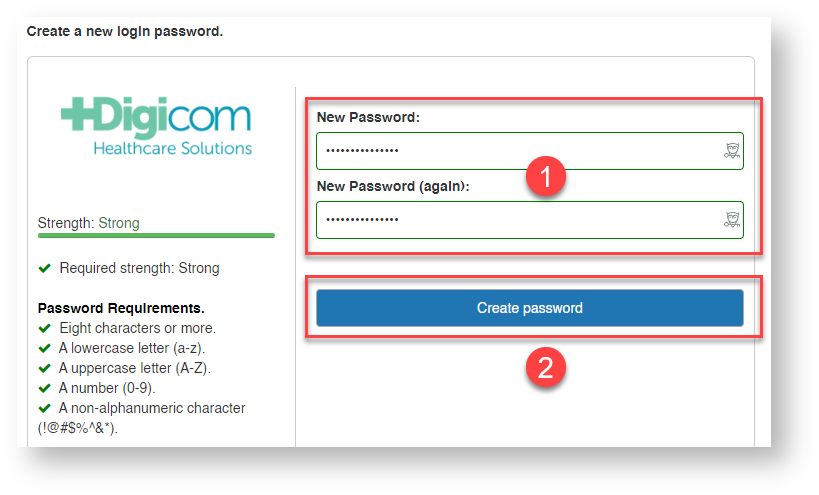
- Recipient Creates Account: Recipient will be asked to select a password to sign up for secure message service and once entered, they click the “Sign up” button. Once recipient signs up, they will use the same password to access the secure messaging portal when you send an encrypted message again.

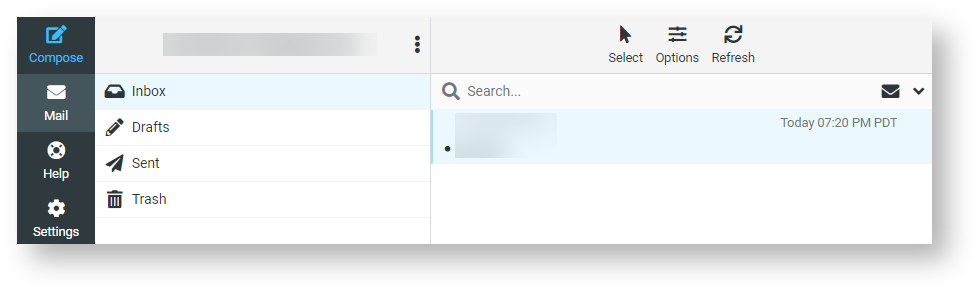
- Recipient Can View & Reply to Messages: Recipient will then be able to view messages as well as download any attachments. They can also reply and send a secure message back if required.