Search for answers or browse our knowledge base.
DTS SecureChat
Initial Setup
-
- Start Rocket.Chat Application: Look for “Rocket.Chat” icon on your computer desktop and double click to launch program.

-
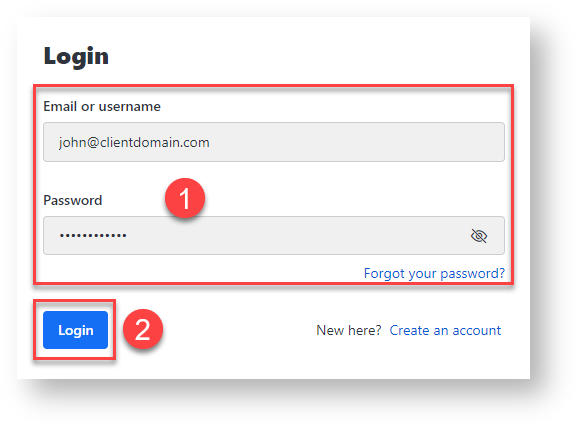
Enter Connection Address: When presented with login window, enter your company connection address including your company internet domain name. The format will be https://chat.YourDomain.com:3000/
You will need to enter connection domain address one time only. Subsequent logins to DTS SecureChat will not require the connection address.
- Log into DTS SecureChat: Enter your company email address, enter your email/network password, and click “Login” button.

- Turn Off Server List View: To provide more screen real, estate, select “View” and toggle off “Server List”.

- Start Rocket.Chat Application: Look for “Rocket.Chat” icon on your computer desktop and double click to launch program.

- Set Notification Sounds:
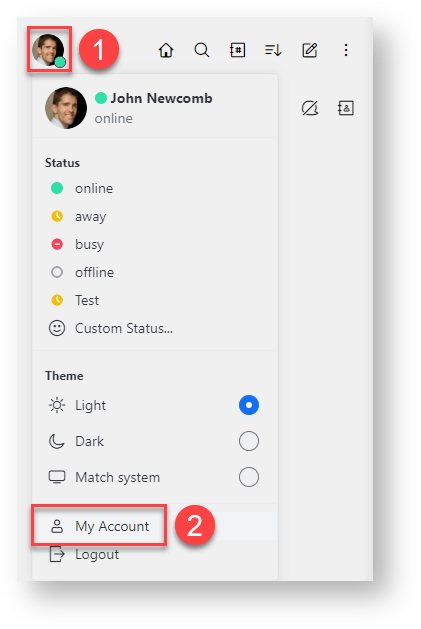
- Click your avatar from the sidebar to access the user panel and select “My Account”.

-
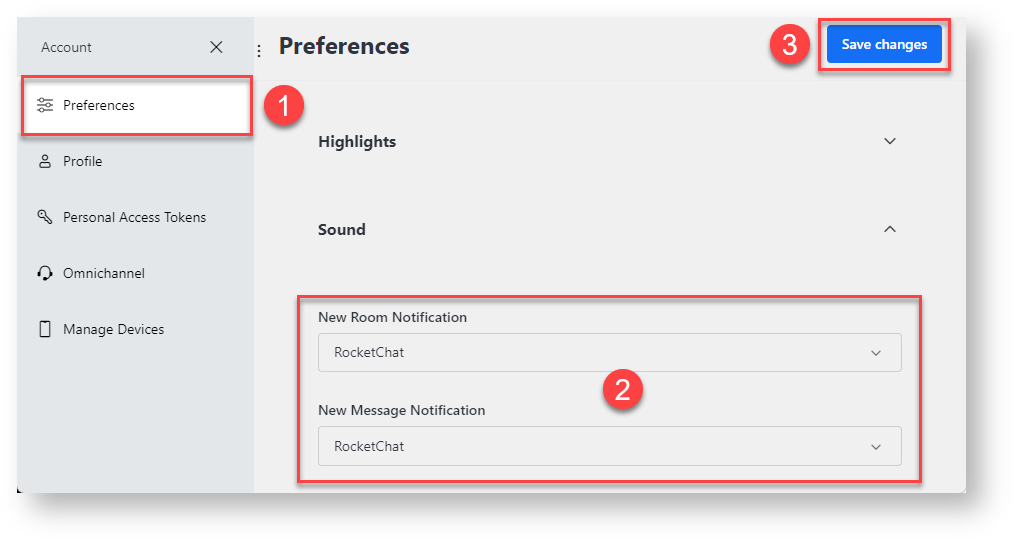
Select “Preferences”, scroll down to “Sound” section, and set “New Room Notification” & “New Message Notification” settings as desired

We recommend the “RocketChat” notification sound but please choose the sounds that suits your liking.
- Click your avatar from the sidebar to access the user panel and select “My Account”.
One on One Chat
Use One on One Chat to carry on a conversation with one individual only.
-
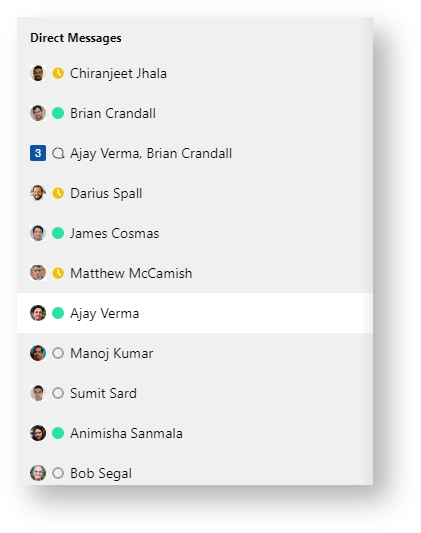
Select Chat User: Click the search button, search for desired user, and click on a desired user to start a new chat.

- After selecting a user to chat with, they will be automatically added to your “Direct Messages” module on left panel.

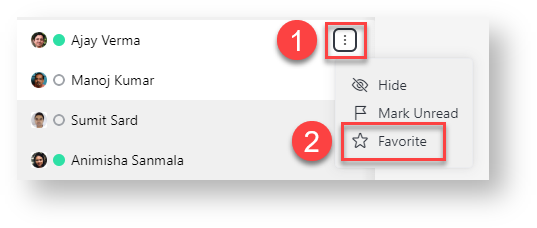
- You may also add any user to your “Favorites” module by selecting three-dot menu to right of user and selecting “Favorite”.

- After selecting a user to chat with, they will be automatically added to your “Direct Messages” module on left panel.
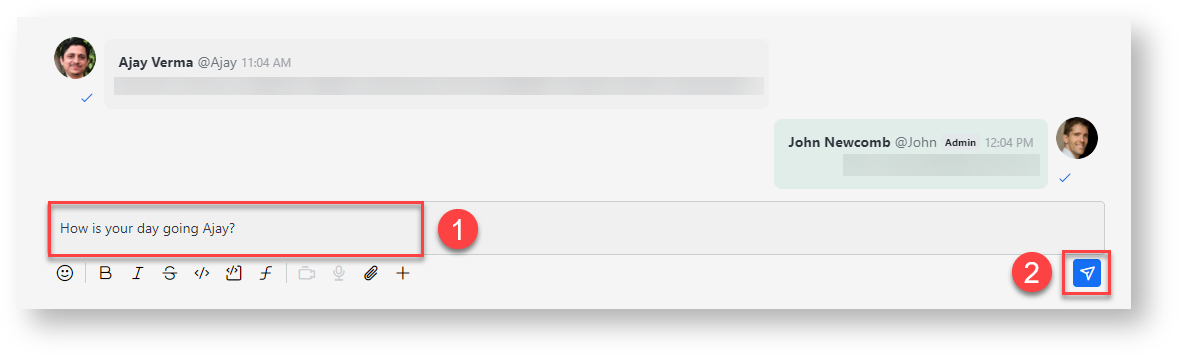
- Enter Message and Send Chat: Enter desired message you would like to share and press “Enter” to send.


When you have unread chat messages, you’ll see the icon shown below on your computer taskbar reflecting your unread messages. You will also receive a notification for every chat in any channels you are in.

Audio, Video, & File Sharing
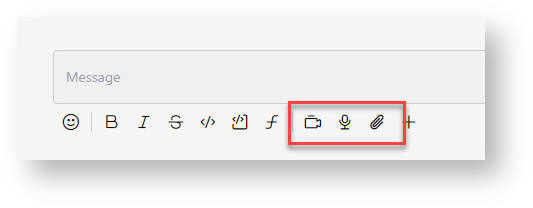
-
- Selecting “Video” (camera icon) will start your webcam and allow you to record a video message.
- Selecting “Audio” (mic icon) file type will start your microphone and allow you to record a audio message.
- Selecting “File” (paperclip icon) file type will open a explorer window and allow you to attach a file to send. You can send multiple files using by holding down “Ctrl” key and selecting desired files.
- You may also simply drag and drop your desired file to share into the chat box window.
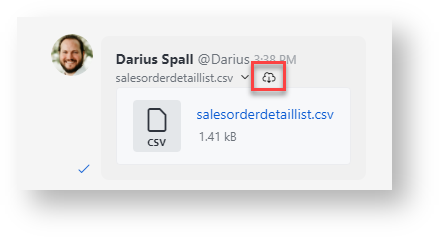
- To save a file you received, click download button next to file in chat window.

Select File Type: During chat process, select the type of file you would like to send (video, audio, or file).

- Send Chat: Once message or file is attached, name file if prompted and press “Send”.
Group Chat
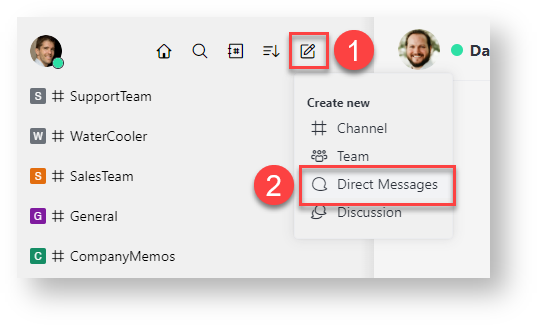
- Start New Direct Message Wizard: From left program panel, click “New” button and select “Direct Messages”.

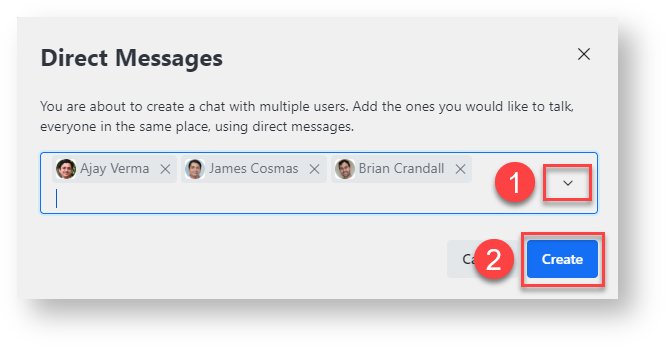
- Select Users & Create Group Chat: Select desired users to include in group chat and click “Create” button.

-
Enter Message and Send Chat: Enter desired message you would like to share with the group and press “Enter” to send.

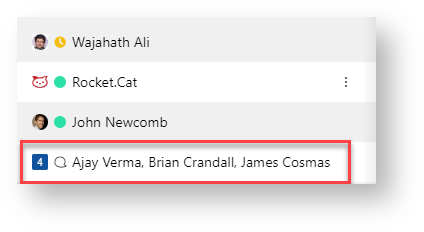
After creating. group chat will be added to direct messages module on left for future access.


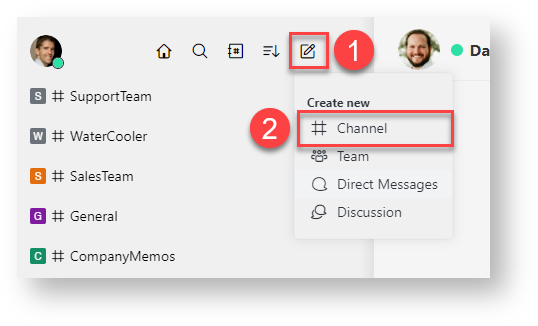
Creating & Using Channels
Use Channels to create a permanent room to carry on a conversation with multiple individuals simultaneously. New members can join a channel and read all the information previously shared by other users.
- Start New Channel Wizard: From left program panel, click “New” button and select “Channel”.
- Select Options & Create Channel: Give channel a name, add a channel topic (optional), add channel members, and click “Create”


- “Private” option is enabled by default as most often, channel membership is managed by channel creator. If a pubic channel is desired that anyone can join however, this option can be disabled.
- Once created, channel will appear for all selected members on left program window in “Channels” module.

- To turn off notification for channels of low importance, select channel, click three dot menu to upper right, click “Notification Preferences” option, and adjust notifications as desired.


- When notifications are turned off, you can also check for new messages by observing if the name of the Channel is Bolded.


Mobile Version
You can access DTS SecureChat via mobile phone app by following the links below or by searching for “RocketChat” in the Apple App store or Google Play store.
Apple IOS: https://apps.apple.com/app/rocket-chat/id1148741252
Google Android: https://play.google.com/store/apps/details?id=chat.rocket.android
Additional Information
Full documentation for DTS SecureChat/Rocket.Chat is avaliable here: https://docs.rocket.chat/