How Can We Help?
Search for answers or browse our knowledge base.
Create an Email Message Template
Table of Contents
To save time when sending messages to patients or anyone else, use an Outlook “Quick Step” to send a pre-formatted message with a few clicks rather than creating a message from scratch.
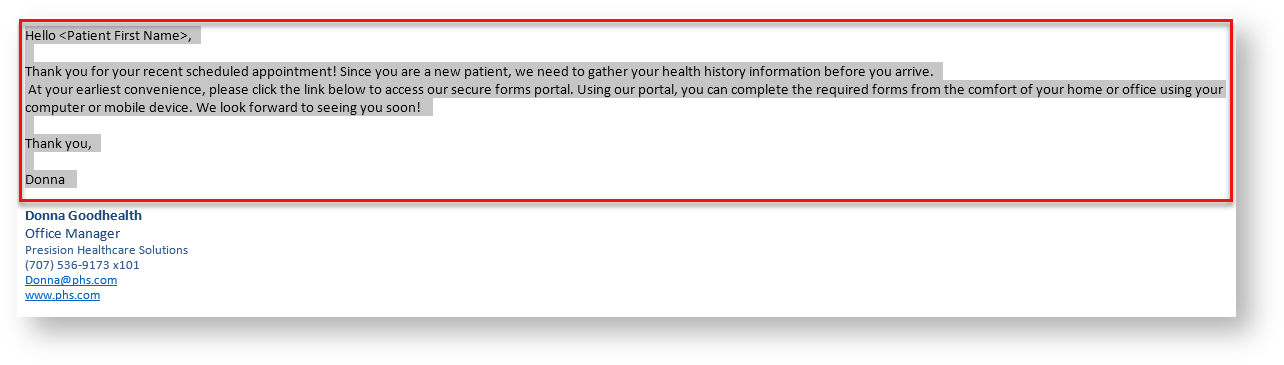
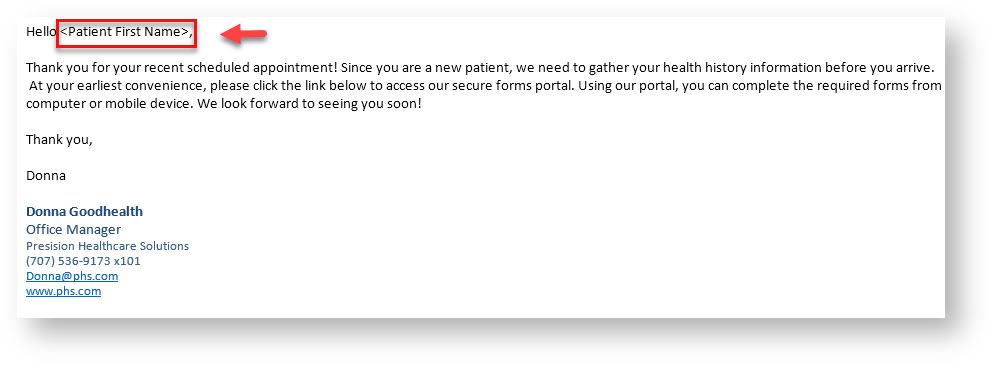
- Create Message: Open Microsoft Outlook, click “New Email” button, and create the message you would like to make into a template. In the example below, I added “<Patient First Name>” as a placeholder which be changed manually each time before sending the template to a patient or other recipient.

- Copy Text to Clipboard: Copy all but your email signature to your computer clipboard (highlight text and select “Control” + “C”).

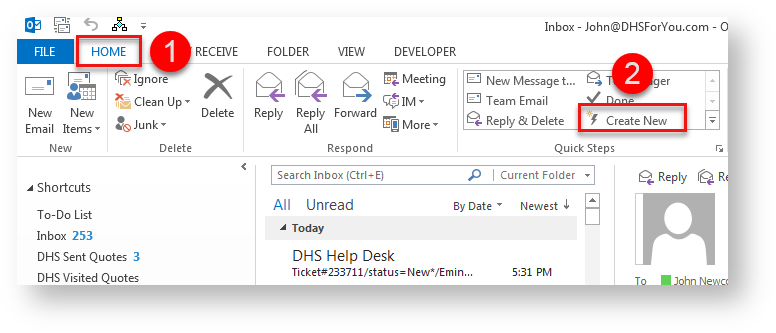
- Create New Quick Step: Open Microsoft Outlook, click “Home” button, and click “Create New” to create new Quick Step.

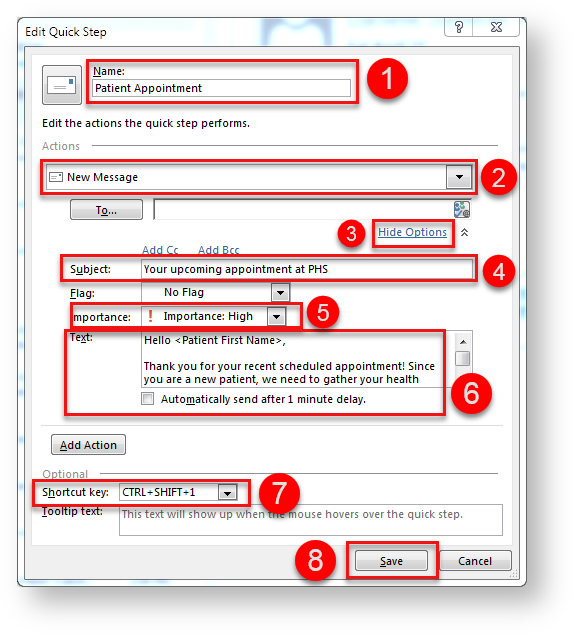
- Choose Options:
- Name Quick Step and use name relating to message content.
- From “Actions” menu, select “New Message”.
- Click “Show Options” link.
- Enter desired message “Subject”.
- Set “Importance” to “High” or other level as required.
- Paste text from clipboard (press “Control” + “V”) into text box.
- Select “Shortcut Key” if you would like to initiate template by pressing the key combination indicated.
- Click “Save”.

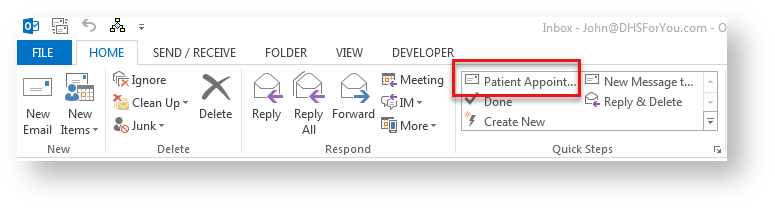
- Initiate Quick Step: To create a new message from the Quick Step template you created, simply click on the associated Quick Step button in Outlook or initiate the hotkey sequence you previously selected.

- Send Message: Clicking on the Quick Step button you created will open a new message with the text you added. If you have Outlook configured to automatically insert your signature, it will follow below your template. If you included a placeholder for the name of your recipient, don’t forget to change it to the recipient’s name before sending.