Search for answers or browse our knowledge base.
DTS SecureShare
With DTS SecureShare, you can securely send large files via the internet to any recipient with an email address. Since email was only designed for files up to 20MB, SecureShare fills the gap when you need to send larger files.
Sending Files
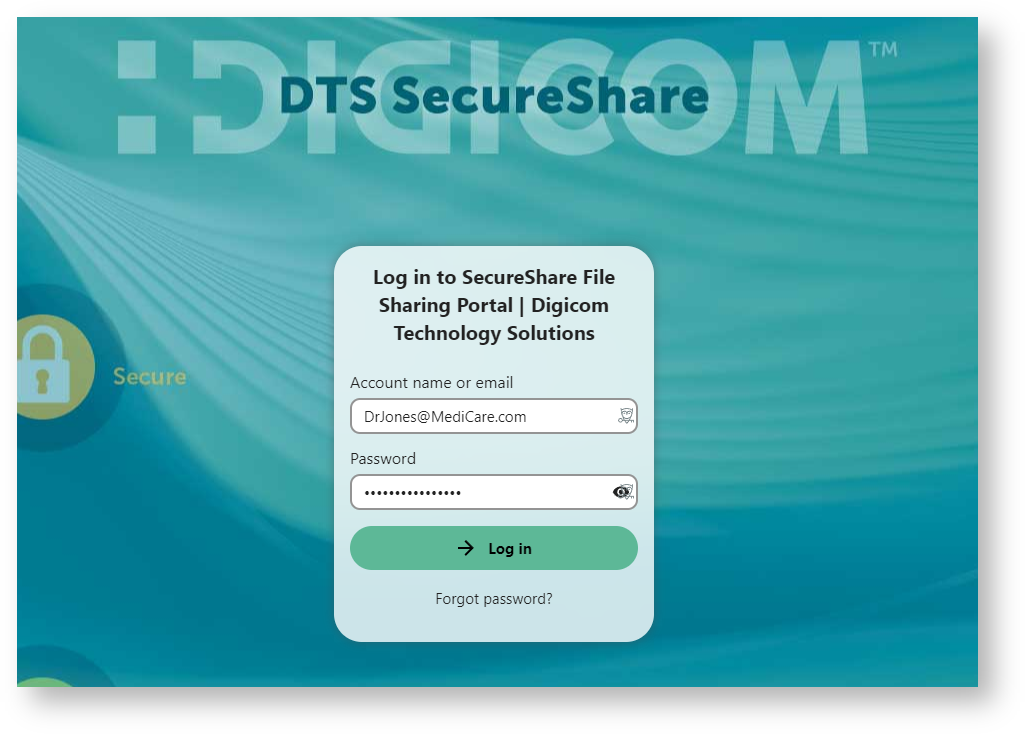
- Browse to Site: Log into file sharing portal by browsing to https://share.dtsit.com.
- Enter your Credentials & Log in: Enter your company email address and password and click “Log In” button.
-
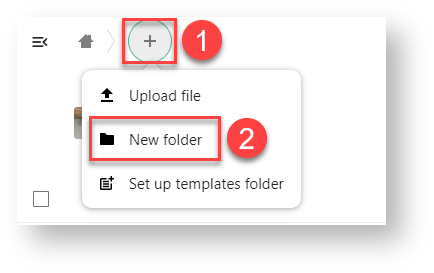
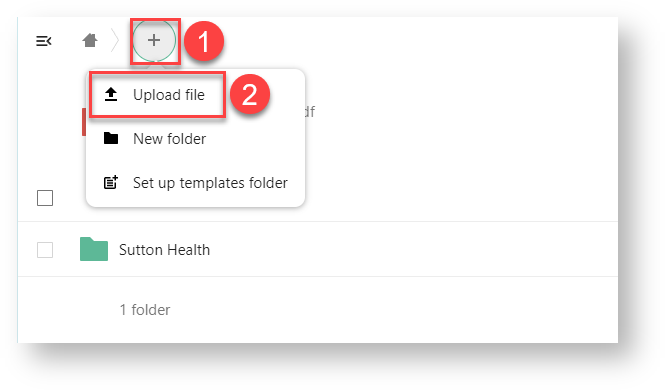
Create Sharing Folder: Click “+” icon on upper left hand corner of page, select “New Folder”, enter a folder name, and click right hand arrow to save.

When creating a share folder, the best practice it to name it by the organization or recipient you are sending to.
-
Add Files: Click to open the folder you just created and either drag and drop files directly on to web page or click upload button to initiate file upload to site.

Rather than create and upload files to a folder, you may also simply drag and drop a folder from you computer desktop into the SecureFile interface.
-
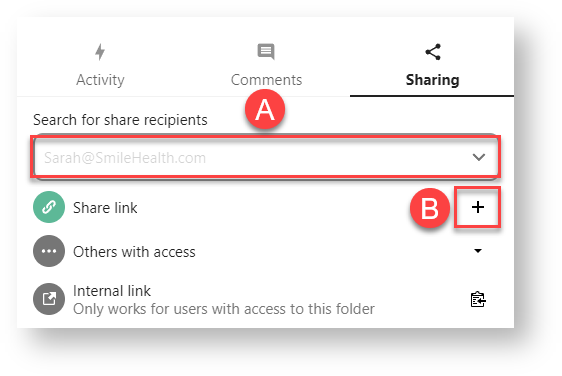
Initiate Sharing: Click share icon to right of folder you would like to share (
 ), enter email address of the recipient you would like to share your files with, OR select “Share link” option.

Entering an email address will immediately send an email your recipient with a link to download the file contents of the folder you have shared. Selecting the “Share Link” option will copy sharing link to your clipboard which you can then paste into an email message to your recipient.
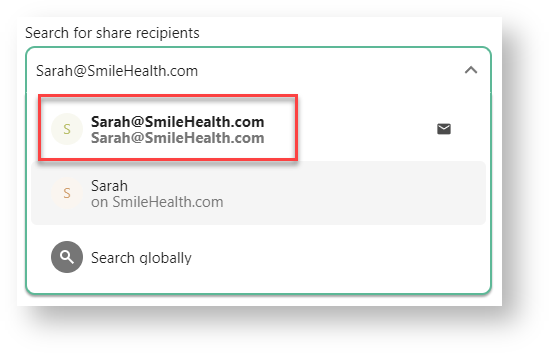
NOTE: If you enter the your recipient’s email address, you’ll need to click to select the address with the envelope icon to send your files. The address will appear double when your recipient does not have a SecureShare account with a first and last name (their email address is used as a placeholder) but this will not prevent them from receiving your file transfer.

-
Select Sharing Options: Click the three dot menu next to the share you’ve created to select additional sharing options if desired (see info bubble below for option descriptions).

Share Options
Read Only: Allows recipient to download shared file(s) but not upload to shared folder.
Allow upload and editing: Allows recipient to download shared file(s), upload new files files to shared folder, and edit shared files.
File drop: Allows recipient to upload new files files to an empty shared folder.
Hide download: Hides download link, making it more difficult to download files for added security is desired (option not normally used).
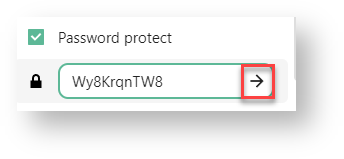
Password Protect: Adds password protection to folder share. If adding this option to email share, an additional email message will be sent to recipient with share password. Use this option to meet HIPAA or other regulatory compliance guidelines.
Set expiration date: Set a date when share is no longer accessibly to recipient.
Note to recipient: Add a custom note to recipient. If adding this option to email share, an additional email message will be sent to recipient with note.NOTE: When selecting “Password protect” or “Note to recipient” options, be sure to click arrow to right of password to save setting


Receiving Files
Once files are sent using email message method from SecureShare site, recipient can obtain files and upload files of their own using the following process:
-
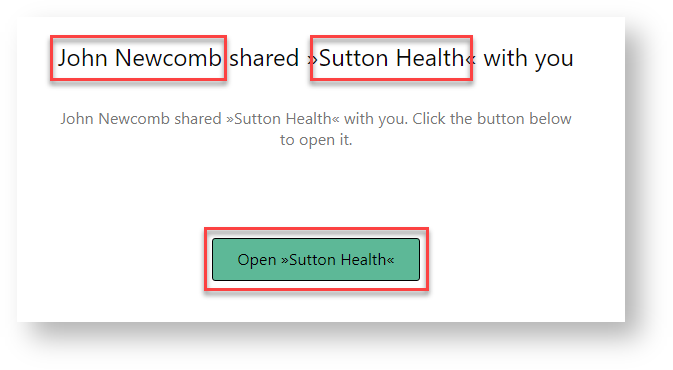
Click “Open” Button in Share Notification Email: Once share notification email is received, click “Open” button to open file or folder share.

As indicated above, the sender’s (SecureShare user) name and folder share name will be shown in the email message to recipient.
- Enter Password If Password Protected Share & Log In: If share sent to recipient is password protected, they will be prompted to enter a password to access share.

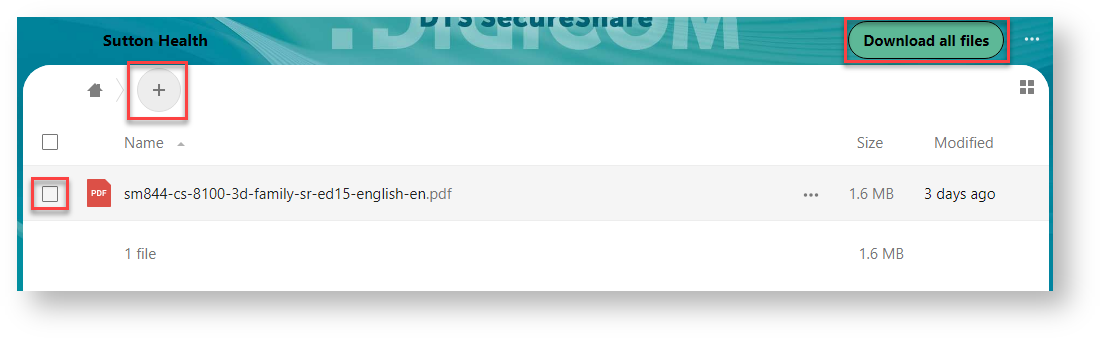
- Download / Upload Files: Recipient can then select the files they need and click “Download” button to download files or “+” button to upload files if upload permission was granted. Recipient can also drag and drop to to upload files.