How Can We Help?
Search for answers or browse our knowledge base.
iPhone/iPad Email Setup – Shared Mailbox
Table of Contents
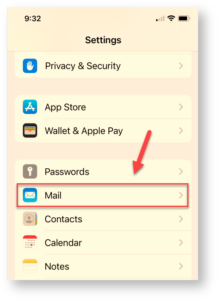
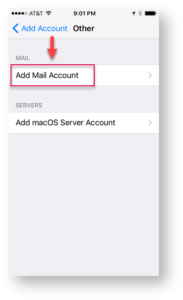
- Select “Settings”: On your iOS device (iPhone or iPad), navigate to and select “Settings”.
- Select “Mail: Select “Mail” button.

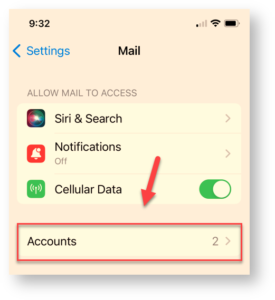
- Select “Accounts”: Select “Accounts” button.

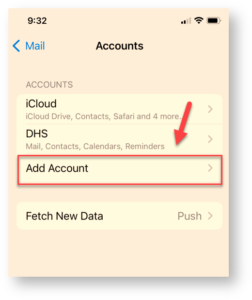
- Select “Add Account”: Select “Add Account” button.

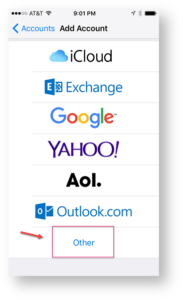
- Select “Other”.

- Select “Add Mail Account” and click “Next”.
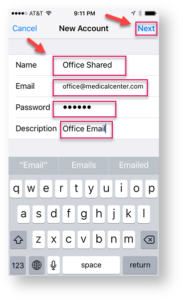
- Enter the following and then select “Next”.
- Name: Enter appropriate name for shared mailbox such as “Office Shared”
- Email: Enter email address of your shared account.
- Password: Enter the password of your primary personal office email account.
- Description: Enter an appropriate description for shared account such as “Office Email”
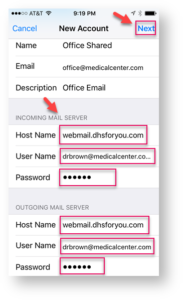
- Enter the following and then select “Next”.
- Host Name: webmail.dtsit.com
- User Name: YourPersonalEmailAddress/SharedEmailAddress. For example: [email protected]/[email protected]
- Password: Enter the password of your primary personal office email account.
- Host Name: webmail.dhsforyou.com
- User Name: Your personal office email address
- Password: Enter the password of your primary personal office email account.
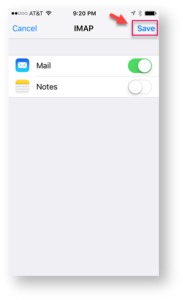
- Click “Save”.