Search for answers or browse our knowledge base.
DTS SecureFax
DTS SecureFax is an easy-to-use HIPAA compliant electronic faxing solution. Refer to the guide below to learn the basics in using the fax system.
Sending Faxes:
- Log into DTS SecureFax Site: Open internet browser and log into DTS SecureFax website.
-
Select “Send a Fax” Menu: Select “Faxes” and “Send a Fax” menu.
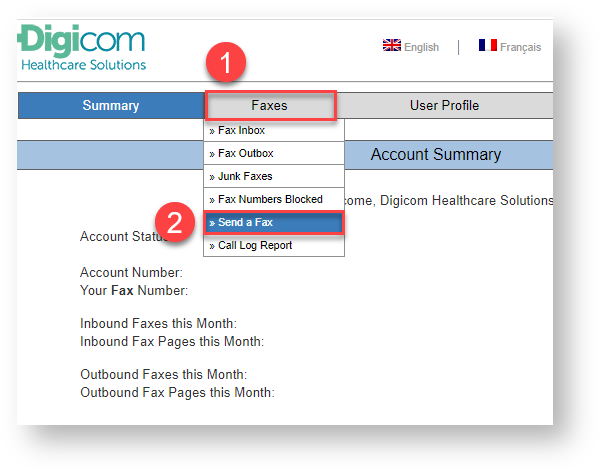
If you don’t yet have a shortcut to your organizations “Fax” folder, please add a Quick Access shortcut to make the folder easily accessible.
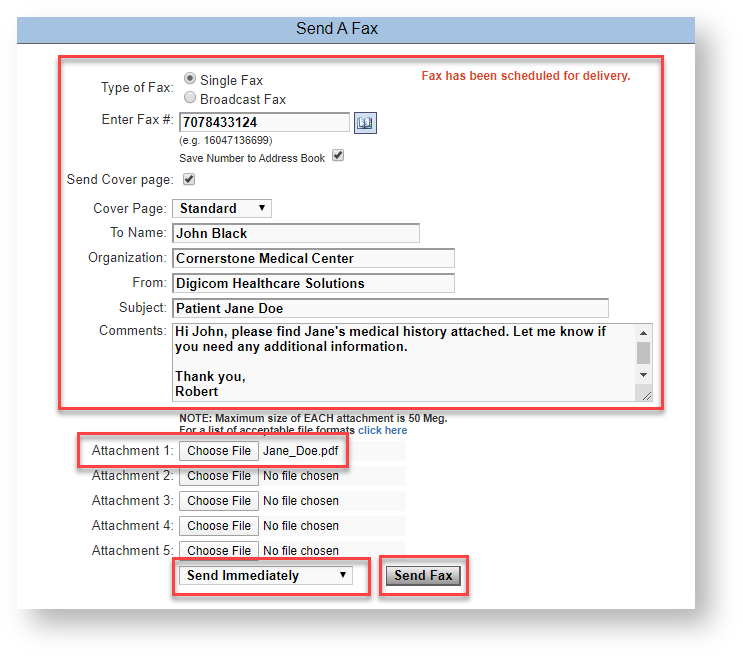
- Select Fax Options & Send: Select options below and send fax.
- Type of Fax: Select “Single Fax” to send to one recipient or “Broadcast Fax” to send to multiple recipients.
-
Enter Fax #: Enter recipient fax number as a 10 or 11 digit phone number (e.g. 415-555-5555) or press address book button to select a saved fax number.
Faxes will transmit regardless if “1” is included on front of fax number or not. Faxes can be sent to all 50 USA states plus Canada. - Save Number to Address Book: Check this box if you would like to save number to your address book.
-
Send Cover Page: Select this option if a cover page is desired and enter recipient name, organization, subject and any desired comments.
The “Standard” cover page style is recommended as styles are nearly identical. To add a custom disclaimer to the cover page of your organization, select “User Profile” menu and “Cover Pages” option.
-
Choose File: Click “Choose File” button, browse to file you would like to fax and click “Open” to attach. You can select up to 5 files to fax at a time.
DTS SecureFax supports PDF, Microsoft Word, JPEG and TIFF file formats.
- Schedule: If desired, click “Send Immediately” drop down to send fax at a later time.
-
Send Fax: When your fax is ready to send, click “Send Fax” button to queue fax for delivery.

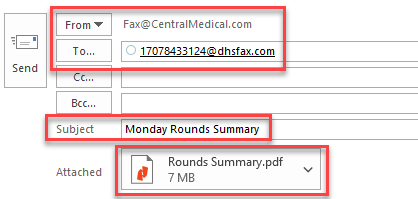
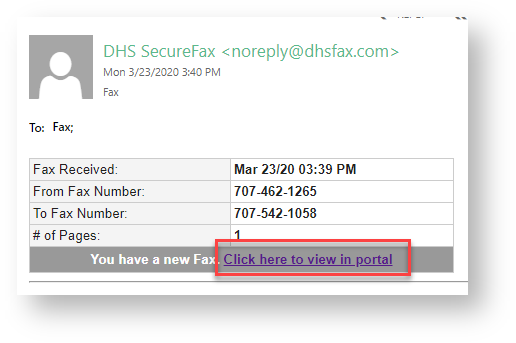
Faxes can also be sent from an email client such as Outlook by entering 11 digit fax number (with a “1” in front) and “@dhsfax.com” to in the “To” field as shown in the example below. To send a fax using an email client, follow the instructions below:
- Create new email message.
- Change “From” address to “[email protected]”.
- Add a fax subject.
- Attach PDF or MS Word file to fax.

Receiving Faxes:
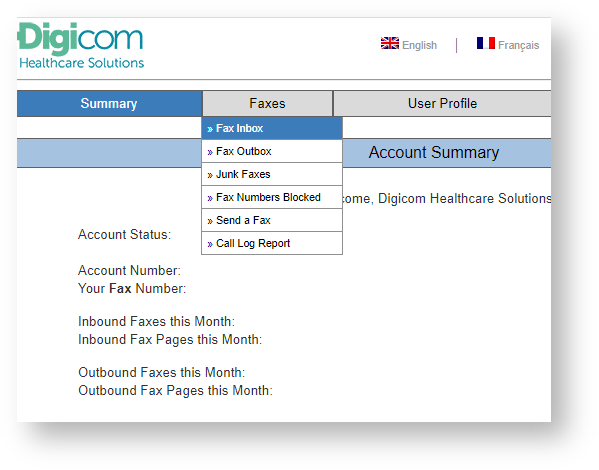
- Log into Portal: Log into DHSFax portal, select “Faxes” menu and “Fax Inbox”.

- View Fax: Click the “View Fax” button next to the fax you would like to access.

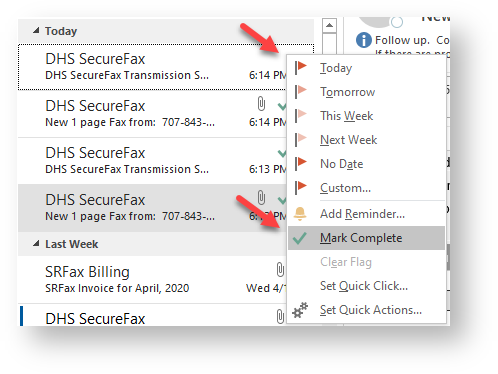
- Mark Fax as Received: Right click fax notification email flag and select “Mark Complete” so all members know fax has been processed.

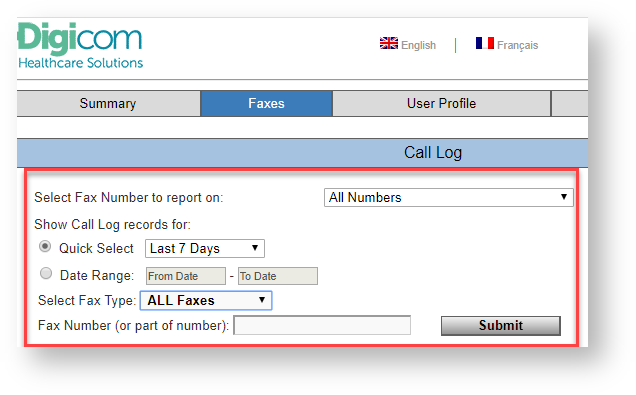
Viewing Logs
To view logs of faxes sent and received, perform the following steps.
- Navigate to “Call Log Report” Module: Select “Faxes” menu and “Call Log Report” to navigate to logs module.

- Select Log Options & Submit: Select the options listed below to run fax log report.
- Select Fax Number to Report on: Leave the default of “All Numbers” or select a specific number representing faxes sent or received in the past to report on.
- Show Call Log Records for: Select an time span option from the drop down box or select a specific date range to report on.
- Select Fax Type: Select “All Faxes” default option or “Sent”, “Received” or “Failed” options.
- Fax Number: Enter a specific fax number to report on (optional).
- Click “Submit” button to create report.